Here's how you can send messages to your phone with Next.js and Twilio ?
Do you want to integrate Twilio with Next.js to send text messages? Then you're at the perfect place.


In this article, I'll walk you through the way to integrate Twilio with Next.js for sending text messages.
Index
- What is Twilio? 🤔
- Demo
- Creating Next.js Project 🚀
- Creating Form 🔤
- Setup Twilio
- Building API Route
- Conclusion
For those who don't know what Twilio is.

What is Twilio? 🤔
Twilio's web service APIs allow software developers to make and receive phone calls, send and receive text messages, and conduct other communication activities programmatically.
Today, we'll only use the Twilio Messaging API and Next.js to deliver text messages. So, let's get this party started:
Demo
Creating Next.js Project 🚀
I'll be using the TypeScript programming language for this project. Of course, I'll talk about things that are only necessary for JS code if you're using JavaScript instead of TypeScript.
For TypeScript:
yarn create next-app twilio-nextjs --typescript # yarn users

npx create-next-app twilio-nextjs --typescript # npm users
For JavaScript:
yarn create next-app twilio-nextjs # yarn users

npx create-next-app twilio-nextjs # npm users
Creating Form 🔤
Now we'll make a form with input fields for the message receiver's phone number and the message to send.
// pages/index.tsx

import type { NextPage } from 'next';
import Head from 'next/head';
import styles from '../styles/Home.module.css';
import { BaseSyntheticEvent, useState } from 'react';

const Home: NextPage = () => {
  const [phone, setPhone] = useState("");
  const [message, setMessage] = useState("");
  const [loading, setLoading] = useState(false);
  const [success, setSuccess] = useState(false);
  const [error, setError] = useState(false);

  const sendMessage = async (e: BaseSyntheticEvent) => {
    e.preventDefault();
    setLoading(true);
    setError(false);
    setSuccess(false);
    const res = await fetch('/api/sendMessage', {
      method: 'POST',
      headers: {
        'Content-Type': 'application/json',
      },
      body: JSON.stringify({ phone: phone, message: message }),
    });
    const apiResponse = await res.json();

    if (apiResponse.success) {
      setSuccess(true);
    } else {
      setError(true);
    }
    setLoading(false);
  };
  return (
    <div className={styles.container}>
      <Head>
        <title>Next.js + Twilio</title>
      </Head>

      <form className={styles.form} onSubmit={sendMessage}>
        <h1 className={styles.title}>Send message using Next.js and Twilio</h1>
        <div className={styles.formGroup}>
          <label htmlFor='phone'>Phone Number</label>
          <input
            onChange={(e) => setPhone(e.target.value)}
            placeholder='Phone Number'
            className={styles.input}
            required
          />
        </div>
        <div className={styles.formGroup}>
          <label htmlFor='message'>Message</label>
          <textarea
            onChange={(e) => setMessage(e.target.value)}
            id='message'
            required
            placeholder='Message'
            className={styles.textarea}
          ></textarea>
        </div>
        <button disabled={loading} type='submit' className={styles.button}>
          Send Message
        </button>
        {success && (
          <p className={styles.success}>Message sent successfully.</p>
        )}
        {error && (
          <p className={styles.error}>
            Something went wrong. Please check the number.
          </p>
        )}
      </form>
    </div>
  );
};

export default Home;
Add this to pages/index.tsx or pages/index.js.
If you are using VS Code or any IDE then it'll show errors, when you paste the above code in the JS file. Then, you have to remove BaseSyntheticEvent and NextPage from the pages/index.js file and those errors will get removed.
If you are familiar with Next.js then, you will understand the above code. And if you see there their I have sent a post request to /api/sendMessage endpoint.
...
const res = await fetch('/api/sendMessage', {
      method: 'POST',
      headers: {
        'Content-Type': 'application/json',
      },
      body: JSON.stringify({ phone: phone, message: message }),
    });
    const apiResponse = await res.json();

    if (apiResponse.success) {
      setSuccess(true);
    } else {
      setError(true);
    }
...
This code will send a post request to the /api/sendMessage endpoint with the receiver's phone number and message to be sent. Later we'll create this API endpoint to send messages using Twilio.
Now, for decent styling, paste the following code in styles/Home.module.css.
.container {
  min-height: 100vh;
  padding: 0 0.5rem;
  display: flex;
  flex-direction: column;
  justify-content: center;
  align-items: center;
  height: 100vh;
}

.main {
  padding: 5rem 0;
  flex: 1;
  display: flex;
  flex-direction: column;
  justify-content: center;
  align-items: center;
}

.form {
  box-shadow: 0px 0px 8px rgba(0, 0, 0, 0.2);
  width: 500px;
  padding: 20px;
  border-radius: 5px;
}

.formGroup {
  display: flex;
  flex-direction: column;
  gap: 5px;
  margin-bottom: 15px;
}

.title {
  line-height: 1.15;
  font-size: 1.3rem;
}

.input,
.textarea {
  padding: 10px;
  border-radius: 5px;
  border: 1px solid;
}

.button {
  display: block;
  width: 100%;
  padding: 10px 0;
}

.button:disabled {
  cursor: progress;
}

.success {
  color: green;
}

.error {
  color: red;
}
Now, run the following command to run the server.
yarn dev # yarn users

npm run dev # npm users
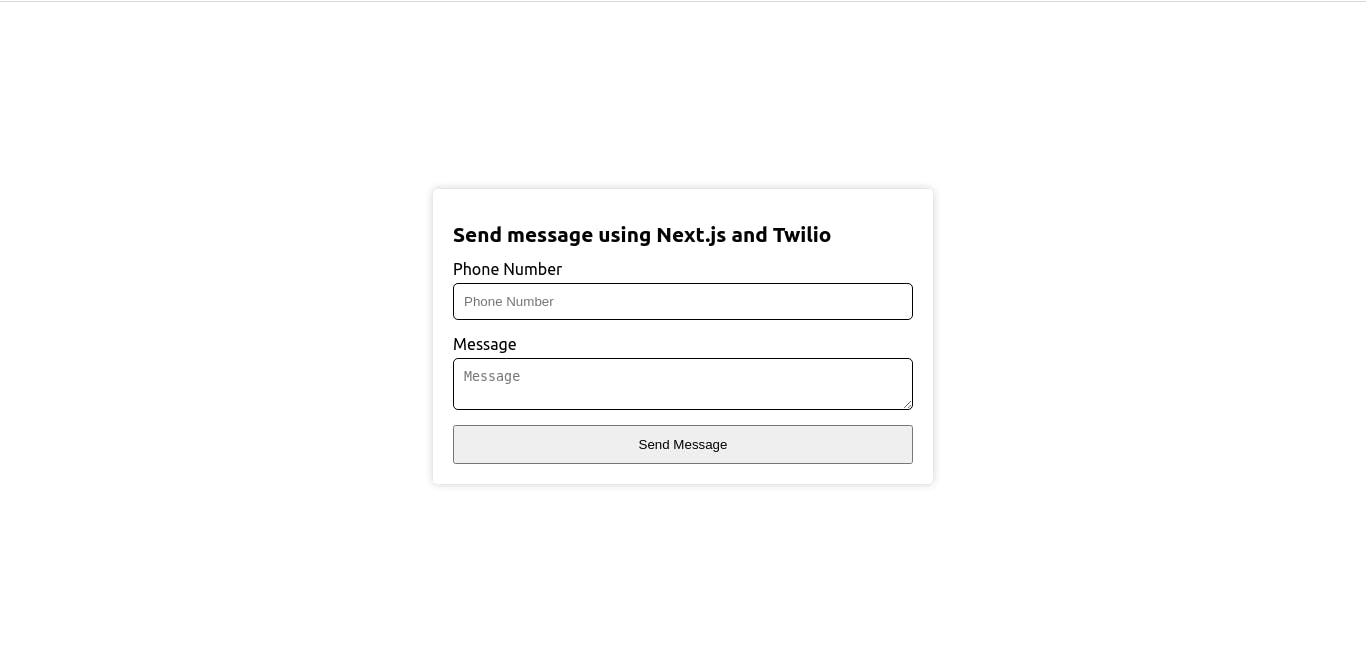
Now, you should see something like this:
Setup Twilio
Go to twilio.com and login with your account else click here(You and me both will get $10 after you upgrade if you use this link) to sign up. Once you create your account then verify your email and your phone number. You'll get redirected to Twilio Dashboard.
For trial you will get $15.50.
Now, in order to send the message we need to have one number to do so. So, let's but one phone number.
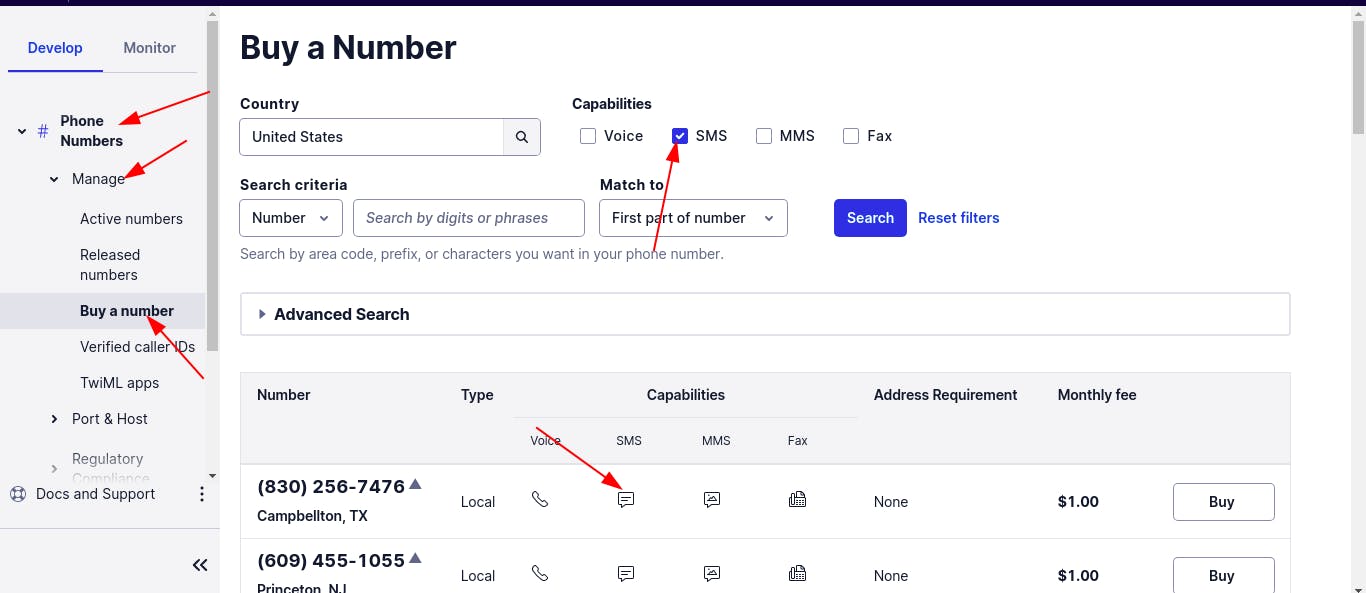
From there, you have to click on Phone Number -> Manage -> Buy a number and from there you can search for a phone number, that you wish to have.
While purchasing the phone numbers, check whether the SMS capability is in that number or not.
Actually, I live in Nepal, but we need to request Nepali numbers to use in the Twilio. So, for now, I will be using a US number.
Click on Buy on the number you want to buy. And the money to buy this number will be deducted from $15.50 which was given by Twilio for Trial.
After you click on Buy. You have to click on Buy YOUR_NUMBER.

Now, that number is yours.
In a trial account, you can't purchase more than one number.
Now, the Twilio setup is complete.
Let's build a Next.js API route to send messages.
Building API Route
Now we'll build an API route to send a message from Twilio. But before that, we have to add Twilio required credentials to .env.local.
So, create a new .env.local file in the root directory of the project. And the following content with your own credentials which you can get from Twilio Dashboard.
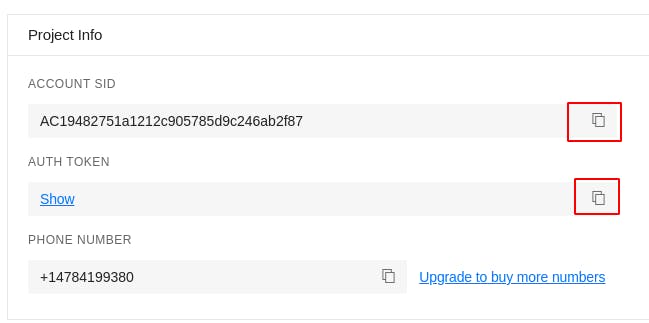
TWILIO_ACCOUNT_SID=YOUR_ACCOUNT_SID
TWILIO_AUTH_TOKEN=YOUR_AUTH_TOKEN
Here we're not adding a phone number in the .env file, I don't know why but using a phone number from env doesn't work. So we have to pass it directly which we'll do just now.
Now, create a new file named sendMessage.ts for typescript users and sendMessage.js for javascript users inside pages/api and add the following content for typescript.
import { NextApiRequest, NextApiResponse } from 'next';
import twilio from 'twilio';

export default function sendMessage(req: NextApiRequest, res: NextApiResponse) {
  const accountSid = <string>process.env.TWILIO_ACCOUNT_SID;
  const token = <string>process.env.TWILIO_AUTH_TOKEN;
  const client = twilio(accountSid, token);
  const { phone, message } = req.body;
  // console.log(phone, message);
  client.messages
    .create({
      body: message,
      from: 'YOUR_PHONE_NUMBER',
      to: phone,
    })
    .then((message) =>
      res.json({
        success: true,
      })
    )
    .catch((error) => {
      console.log(error);
      res.json({
        success: false,
      });
    });
}
and for javascript paste the following code.
import twilio from 'twilio';

export default function sendMessage(req, res) {
  const accountSid = process.env.TWILIO_ACCOUNT_SID;
  const token = process.env.TWILIO_AUTH_TOKEN;
  const client = twilio(accountSid, token);
  const { phone, message } = req.body;
  // console.log(phone, message);
  client.messages
    .create({
      body: message,
      from: 'YOUR_PHONE_NUMBER',
      to: phone,
    })
    .then((message) =>
      res.json({
        success: true,
      })
    )
    .catch((error) => {
      console.log(error);
      res.json({
        success: false,
      });
    });
}
In the above codes, the code that sends the message is here:
client.messages
    .create({
      body: message,
      from: 'YOUR_PHONE_NUMBER',
      to: phone,
    })
In the API, we have sent {success: true} response if the message was sent and {success: false} response if the message wasn't sent.
Now, this should work.
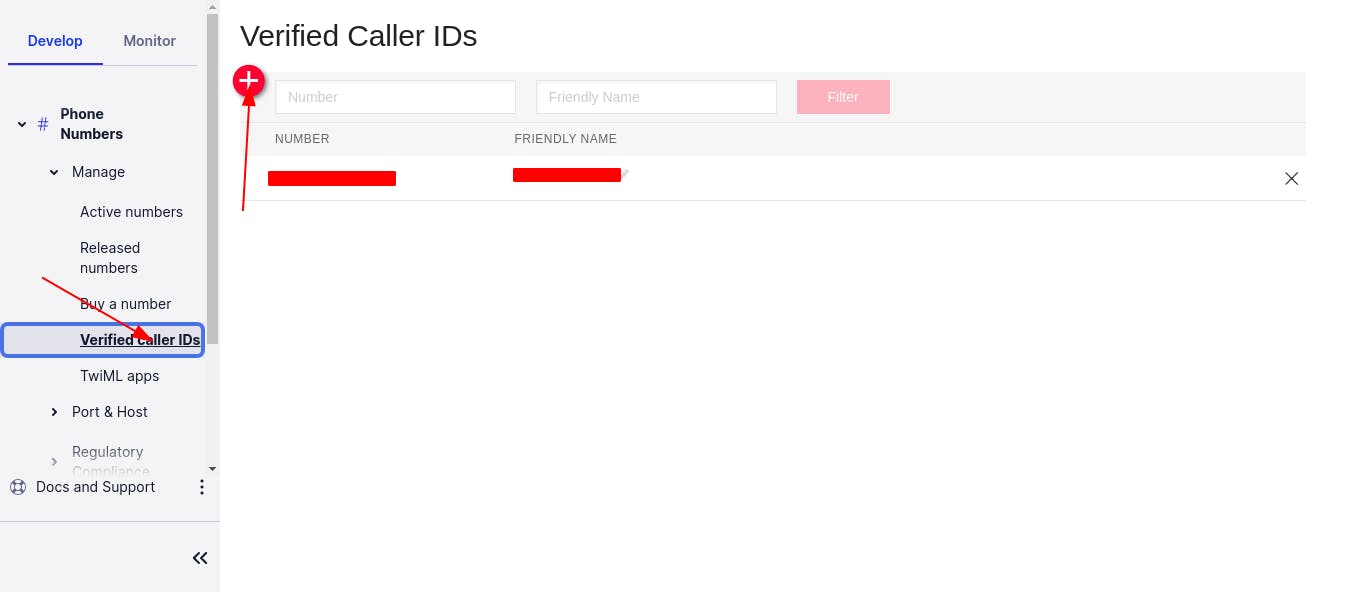
Trial account can only send messages to verified phone numbers, so you can only send the messages to the number that you used while verifying the Twilio account and if you want to send messages to other numbers, then either you have to upgrade your account or add that number to
Verified Caller IDs.Protip: If you're a student, then you can apply for Github Student Pack and it will provide $50 credits to your Twilio account.
Conclusion
This is all about, how you can send text messages using Next.js with Twilio. Hope you like this article. If you got any problems, share them in the comment section.
Github Link: Click Here
Connect with me: