Blitz.js: The Fullstack React Framework Part 2
Learn by building a project management application
Welcome Back 👋
Hey, Hashnoders, welcome back to the second part of the Blitz.js: The Fullstack React Framework series.
Check part one if you haven't already: https://cb-ashik.hashnode.dev/blitzjs-the-fullstack-react-framework
In the previous part, we have completed setting up a fresh blitz.js project, added Tailwind CSS to it using a recipe, created a database model, and generated the files required for this project.
Today, we'll start by updating the schema file.
So, let's start.
Index
Update Database Schema
In the previous article, we finished up creating the relationship between project and tasks table, but there we haven't created the field for storing task name and task description. So, first, let's update the scheme.prisma file with required fields.
// file: db/schema.prisma
...

model Project {
  id          Int      @id @default(autoincrement())
  createdAt   DateTime @default(now())
  updatedAt   DateTime @updatedAt
  name        String
  description String
  tasks       Task[]
}

model Task {
  id          Int      @id @default(autoincrement())
  createdAt   DateTime @default(now())
  updatedAt   DateTime @updatedAt
  project     Project  @relation(fields: [projectId], references: [id])
  projectId   Int
  // Add the following new fields
  name        String
  description String?
}
If you haven't noticed what we have changed, check the Task model, where we have added the name field of String type and description of String with nullable ?.
That's it for the schema.
Now run the command blitz prisma migrate dev. And give any name for migration, but since we have updated the tasks table by adding two new fields so, I'll name it update_tasks_table. If you open the Prisma studio using blitz prisma studio, you will see two new fields in the tasks table.
Let's build the logic.
Understanding and updating Logics
We'll understand mutations and queries to alter the data in the database and fetch the data from the database which are generated by code scaffolding from our previous part but since we have added the new field we have to update mutations and logics too.
Logics for Project
First, let's create the CRUD operation for the project.
Open app/projects/mutations/createProject.ts and add the following.
// app/projects/mutations/createProject.ts
import { resolver } from "blitz"
import db from "db"
import { z } from "zod"

const CreateProject = z.object({
  name: z.string(),
  description: z.string(),
})

export default resolver.pipe(
  resolver.zod(CreateProject), // This is a handly utility for using Zod, an awesome input validation library. It takes a zod schema and runs schema.parse on the input data.
  resolver.authorize(), // Require Authentication
  async (input) => {
    // Create the project
    const project = await db.project.create({ data: input })
    // Return created project
    return project
  }
)
Let's split the code and understand each line.
import { resolver } from "blitz": Blitz exports a resolver object which contains a few utilities. "Resolver" as used here and for queries and mutations refers to a function that takes some input and "resolves" that into some output or side effect. Click here to know moreimport db from "db": Heredbis a Prisma client enhanced byblitz.import { z } from "zod": Zod is a TypeScript-first schema declaration and validation library. I'm using the term "schema" to broadly refer to any data type, from a simple string to a complex nested object. Click here to know moreconst CreateProject:CreateProjectis an object schema that validates if the given input contains thenamefield ofstringtype anddescriptionfield of 'string' type.resolver.pipe: This is a functional pipe that makes it easier and cleaner to write complex resolvers. A pipe automatically pipes the output of one function into the next function. ( Blitz.js Docs )resolver.zod(CreateProject): This is a handy utility for using Zod, an awesome input validation library. It takes a zod schema and runs schema.parse on the input data. ( Blitz.js Docs )resolver.authorize(): Using resolver.authorize in resolver.pipe is a simple way to check whether the user has the authorization to call the query or mutation or not. ( Blitz.js Docs )async (input) => {}: This async function is a callback.db.project.create: Create a new project in the database.return project: Returns the created data.
Now, we have built the logic to create a project.
Let's build the logic to get projects.
// file: app/projects/queries/getProjects.ts
import { paginate, resolver } from "blitz"
import db, { Prisma } from "db"

interface GetProjectsInput
  extends Pick<Prisma.ProjectFindManyArgs, "where" | "orderBy" | "skip" | "take"> {}

export default resolver.pipe(
  resolver.authorize(),
  async ({ where, orderBy, skip = 0, take = 100 }: GetProjectsInput) => {
    // TODO: in multi-tenant app, you must add validation to ensure correct tenant
    const {
      items: projects,
      hasMore,
      nextPage,
      count,
    } = await paginate({
      skip,
      take,
      count: () => db.project.count({ where }),
      query: (paginateArgs) =>
        db.project.findMany({ ...paginateArgs, where, orderBy, include: { tasks: true } }),
    })

    return {
      projects,
      nextPage,
      hasMore,
      count,
    }
  }
)
In this file, made a single change and that is I have added the include option in db.project.findMany().
What this will do is, includes all the tasks that belong to the respective project.
Now let's understand each line of this code. I'll not repeat the one that I have already written while building the create project logic. I'll also skip the imports.
interface GetProjectsInput
extends Pick<Prisma.ProjectFindManyArgs, "where" | "orderBy" | "skip" | "take"> {}
: What this will do is, create a interface by picking the set of properties (where, orderBy, skip, take) fromPrisma.ProjectFindManyArgs. ( TS Docs )
Prisma.ProjectFindManyArgs: Prisma generates the types for the model and the arguments. Here we are using ProjectFindManyArgs` which was generated by Prisma.paginate: This is a handy utility for query pagination. ( Blitz.js Docs ).db.project.count({where}): Returns the number of data from the database that follows the conditions we passed in where argument.( Prisma Docs )db.project.findMany(): Get all the data from the projects table. If you compare this with the originally generated one, then we'll know that we have added theincludeoption in this. From with we will get all the tasks that belong to this table.
Now let's look at how to get a single project.
// app/projects/queries/getProject.ts
import { resolver, NotFoundError } from "blitz"
import db from "db"
import { z } from "zod"

const GetProject = z.object({
  // This accepts type of undefined, but is required at runtime
  id: z.number().optional().refine(Boolean, "Required"),
})

export default resolver.pipe(resolver.zod(GetProject), resolver.authorize(), async ({ id }) => {
  // TODO: in multi-tenant app, you must add validation to ensure correct tenant
  const project = await db.project.findFirst({ where: { id }, include: { tasks: true } })

  if (!project) throw new NotFoundError()

  return project
})
.refine(): (ZOD Docs)db.project.findFirst(): Return the first data that satisfies the given condition. (Prisma Docs)throw new NotFoundError(): Throw 404 error.
Now, let's see the logic to update the project.
// app/projects/mutations/updateProject.ts
import { resolver } from "blitz"
import db from "db"
import { z } from "zod"

const UpdateProject = z.object({
  id: z.number(),
  name: z.string(),
  description: z.string(),
})

export default resolver.pipe(
  resolver.zod(UpdateProject),
  resolver.authorize(),
  async ({ id, ...data }) => {
    // TODO: in multi-tenant app, you must add validation to ensure correct tenant
    const project = await db.project.update({ where: { id }, data })

    return project
  }
)
db.project.update(): Update the data with the given data in the project row with the given id. (Prisma Docs)
Finally, it's time for the logic to delete the project.
// app/projects/mutations/deleteProject.ts

import { resolver } from "blitz"
import db from "db"
import { z } from "zod"

const DeleteProject = z.object({
  id: z.number(),
})

export default resolver.pipe(resolver.zod(DeleteProject), resolver.authorize(), async ({ id }) => {
  // TODO: in multi-tenant app, you must add validation to ensure correct tenant
  const tasks = await db.task.deleteMany({ where: { projectId: id } })
  const project = await db.project.deleteMany({ where: { id } })

  return project
})
If you look there, I have added a new line const tasks = = await db.task.deleteMany({ where: { projectId: id } }). This will first delete all the tasks that belong to that project and only then the actual project got removed.
db.project.deleteMany: This will delete the rows from the table which satisfy the given criteria.
Now, The CRUD for the project has been completed, now it's time for CRUD operation of tasks.
Logics for Tasks
Let's update the tasks logic for creating a new task.
// app/tasks/mutations/createTask.ts

import { resolver } from "blitz"
import db from "db"
import { z } from "zod"

const CreateTask = z.object({
  name: z.string(),
  projectId: z.number(),
  // This is what we have added
  description: z.string().optional(),
})

export default resolver.pipe(resolver.zod(CreateTask), resolver.authorize(), async (input) => {
  // TODO: in multi-tenant app, you must add validation to ensure correct tenant
  const task = await db.task.create({ data: input })

  return task
})
Everything looks familiar, Nah. We have already discussed the syntax used up here before.
After we created tasks, we need to retrieve the tasks, so let getAll the tasks.
// app/tasks/queries/getTasks.ts

import { paginate, resolver } from "blitz"
import db, { Prisma } from "db"

interface GetTasksInput
  extends Pick<Prisma.TaskFindManyArgs, "where" | "orderBy" | "skip" | "take"> {}

export default resolver.pipe(
  resolver.authorize(),
  async ({ where, orderBy, skip = 0, take = 100 }: GetTasksInput) => {
    // TODO: in multi-tenant app, you must add validation to ensure correct tenant
    const {
      items: tasks,
      hasMore,
      nextPage,
      count,
    } = await paginate({
      skip,
      take,
      count: () => db.task.count({ where }),
      query: (paginateArgs) => db.task.findMany({ ...paginateArgs, where, orderBy }),
    })

    return {
      tasks,
      nextPage,
      hasMore,
      count,
    }
  }
)
Everything is the same up here as generated.
Let's see the mutation to update the task.
// app/tasks/mutations/updateTask.ts

import { resolver } from "blitz"
import db from "db"
import { z } from "zod"

const UpdateTask = z.object({
  id: z.number(),
  name: z.string(),
  // The only thing we have added
  description: z.string().optional(),
})

export default resolver.pipe(
  resolver.zod(UpdateTask),
  resolver.authorize(),
  async ({ id, ...data }) => {
    // TODO: in multi-tenant app, you must add validation to ensure correct tenant
    const task = await db.task.update({ where: { id }, data })

    return task
  }
)
For the getTask query and delete mutation, leave it as it is.
Now we're done for Logics.
Building UI
We have already installed Tailwind CSS with the blitz recipe in the previous part. ( Read it here ). So, we'll be using the Tailwind CSS library for this project. And we'll create a simple UI using TailwindCSS.
SignUp Page Component
Link: /signup
Open app/auth/pages/signup.tsx. There you will see that they are using the custom component SignupForm for the form. So, open it from app/auth/components/SignupForm.tsx. Then there you will see that they are using the custom Form Component and LabeledTextField components.
So our first work will be to customize Form and LabeledTextFieldComponent.
Open app/core/Form.tsx and add p-5 border rounded classes in the form tag and add text-sm class in alert.
// app/core/components/Form.tsx

 <form onSubmit={handleSubmit} className="form p-5 border rounded" {...props}>
         {submitError && (
            <div role="alert" className="text-sm" style={{ color: "red" }}>
              {submitError}
            </div>
          )}
         ...
</form>
...
Now, let's customize LabeledTextFieldComponent.
For this, first, we will create a custom component for input with tailwind style classes.
Go to app/core/components and open a file LabeledTextField.tsx and update it with the following code.
// app/core/components/LabeledTextField.tsx

import { forwardRef, PropsWithoutRef } from "react"
import { useField } from "react-final-form"

export interface LabeledTextFieldProps extends PropsWithoutRef<JSX.IntrinsicElements["input"]> {
  /** Field name. */
  name: string
  /** Field label. */
  label: string
  /** Field type. Doesn't include radio buttons and checkboxes */
  type?: "text" | "password" | "email" | "number"
  outerProps?: PropsWithoutRef<JSX.IntrinsicElements["div"]>
}

export const LabeledTextField = forwardRef<HTMLInputElement, LabeledTextFieldProps>(
  ({ name, label, outerProps, ...props }, ref) => {
    const {
      input,
      meta: { touched, error, submitError, submitting },
    } = useField(name, {
      parse: props.type === "number" ? Number : undefined,
    })

    const normalizedError = Array.isArray(error) ? error.join(", ") : error || submitError

    return (
      <div {...outerProps}>
        <label className="flex flex-col items-start">
          {label}
          <input
            {...input}
            className="px-1 py-2 border rounded focus:ring focus:outline-none ring-purple-200 block w-full my-2"
            disabled={submitting}
            {...props}
            ref={ref}
          />
        </label>

        {touched && normalizedError && (
          <div role="alert" className="text-sm" style={{ color: "red" }}>
            {normalizedError}
          </div>
        )}
      </div>
    )
  }
)

export default LabeledTextField
Always remember that the components that are required for a specific model, we have to create that inside the components folder in that model, for example. if we want a form to create a project then we add that form component inside
app/project/components. But if that component is not model specific, then we create those components insideapp/core/components.
Let's create a new core Button component to use everywhere on the site.
// app/core/components/Button.tsx

export const Button = ({ children, ...props }) => {
  return (
    <button className="bg-purple-600 text-white px-3 py-2 rounded" {...props}>
      {children}
    </button>
  )
}
Now let's use this new Button component in Form.tsx.
In app/core/components/Form.tsx replace
{submitText && (
     <button type="submit" disabled={submitting}>
          {submitText}
     </button>
)}
with
{submitText && (
     <Button type="submit" disabled={submitting}>
          {submitText}
     </Button>
)}
And don't forget to import the Button.
import { Button } from "./Button"
Now, you should have something like this.

Let's customize this page more.
We'll use a separate layout for the authentication pages. So, go to app/core/layouts and create a new file named AuthLayout.tsx and add the following contents.
// app/core/layouts/AuthLayout.tsx

import { ReactNode } from "react"
import { Head } from "blitz"

type LayoutProps = {
  title?: string
  heading: string
  children: ReactNode
}

const AuthLayout = ({ title, heading, children }: LayoutProps) => {
  return (
    <>
      <Head>
        <title>{title || "ProjectManagement"}</title>
        <link rel="icon" href="/favicon.ico" />
      </Head>

      <div className="flex justify-center">
        <div className="w-full md:w-2/3 lg:max-w-2xl mt-5">
          <h2 className="text-xl mb-2">{heading}</h2>
          <div>{children}</div>
        </div>
      </div>
    </>
  )
}

export default AuthLayout
Now go to the SignupForm component and remove the h1 tag. After removing <h1>Create an Account</h1> the file should look like.
import { useMutation } from "blitz"
import { LabeledTextField } from "app/core/components/LabeledTextField"
import { Form, FORM_ERROR } from "app/core/components/Form"
import signup from "app/auth/mutations/signup"
import { Signup } from "app/auth/validations"

type SignupFormProps = {
  onSuccess?: () => void
}

export const SignupForm = (props: SignupFormProps) => {
  const [signupMutation] = useMutation(signup)

  return (
    <div>

      <Form
        submitText="Create Account"
        schema={Signup}
        initialValues={{ email: "", password: "" }}
        onSubmit={async (values) => {
          try {
            await signupMutation(values)
            props.onSuccess?.()
          } catch (error) {
            if (error.code === "P2002" && error.meta?.target?.includes("email")) {
              // This error comes from Prisma
              return { email: "This email is already being used" }
            } else {
              return { [FORM_ERROR]: error.toString() }
            }
          }
        }}
      >
        <LabeledTextField name="email" label="Email" placeholder="Email" />
        <LabeledTextField name="password" label="Password" placeholder="Password" type="password" />
      </Form>
    </div>
  )
}

export default SignupForm
Now, we have to tell signup page to use AuthLayout as layout.
For that, go to app/auth/pages/signup.tsx and change the folowing line:
SignupPage.getLayout = (page) => <Layout title="Sign Up">{page}</Layout>
to
SignupPage.getLayout = (page) => <AuthLayout heading="Create an account" title="Sign Up">{page}</AuthLayout>
and import AuthLayout.
import AuthLayout from "app/core/layouts/AuthLayout"
Now, your signup page should look like this.
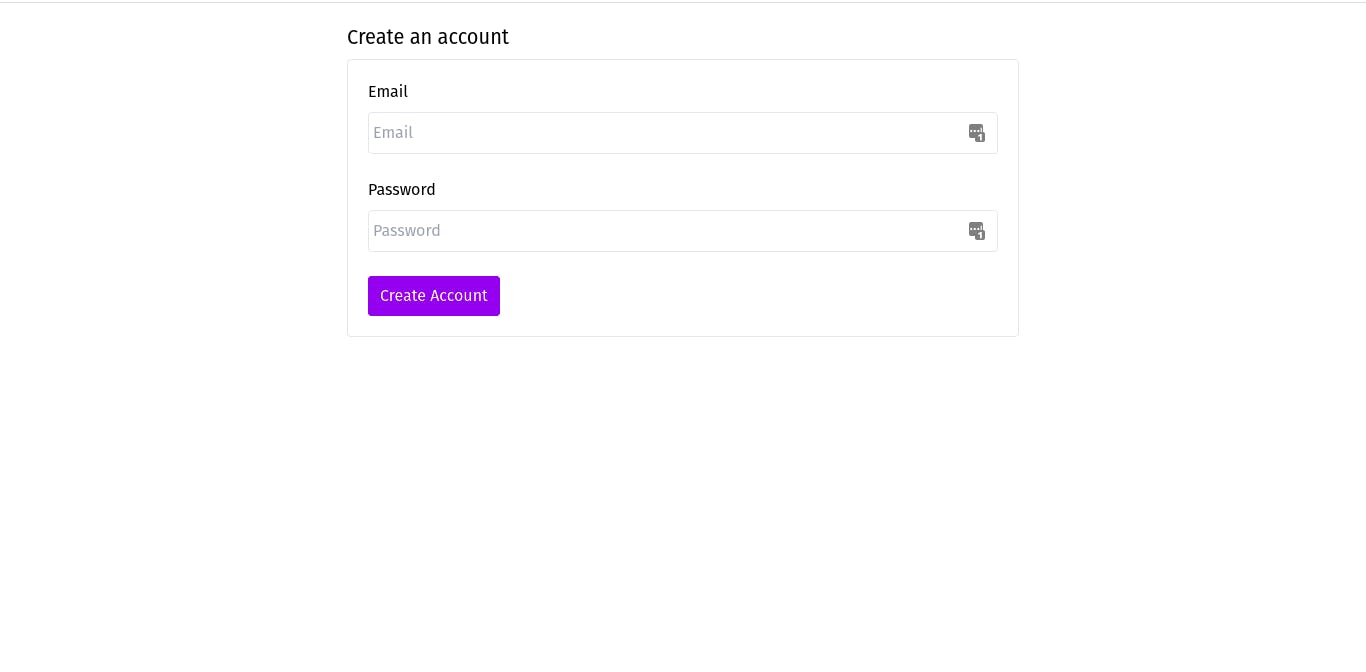
⚠️ Ignore that LastPass sign in the input field.
Let's include a link to go to the login page in the signup page.
For this, we'll create our own custom Link component with tailwind style.
Go to /app/core/components and create a new file CustomLink.tsx and add the following.
// app/core/components/CustomLink.tsx

import { Link } from "blitz"

export const CustomLink = ({ children, href }: any) => {
  return (
    <Link href={href}>
      <a className="text-purple-700">{children}</a>
    </Link>
  )
}
Now, to include the go-to login link you have to add the following line after the Form tag.
...
</Form>
<div className="mt-2">
     <CustomLink href={Routes.LoginPage()}>Already have account? Login</CustomLink>
</div>
After all this, your signup page should look like this.
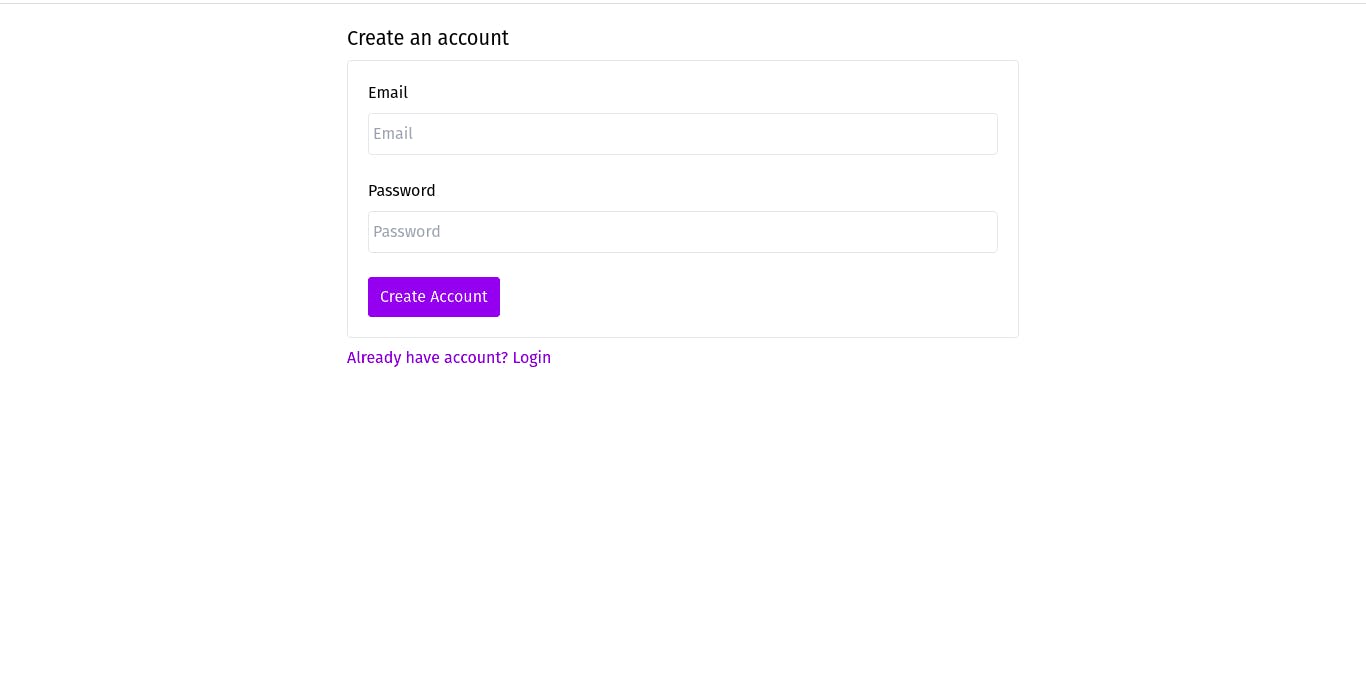
Now, since we have already styled many components in the SignUp UI section now, for other pages we won't have to do too much work for other pages.
Login Page
Link : '/login'
For the login page customization replace the following line in login.tsx:
// app/auth/pages/login

LoginPage.getLayout = (page) => <Layout title="Log In">{page}</Layout>
to
LoginPage.getLayout = (page) => (
  <AuthLayout heading="Welcome back, login here" title="Log In">
    {page}
  </AuthLayout>
)
and import AuthLayout.
import AuthLayout from "app/core/layouts/AuthLayout"
After doing this, your login page should look like this.
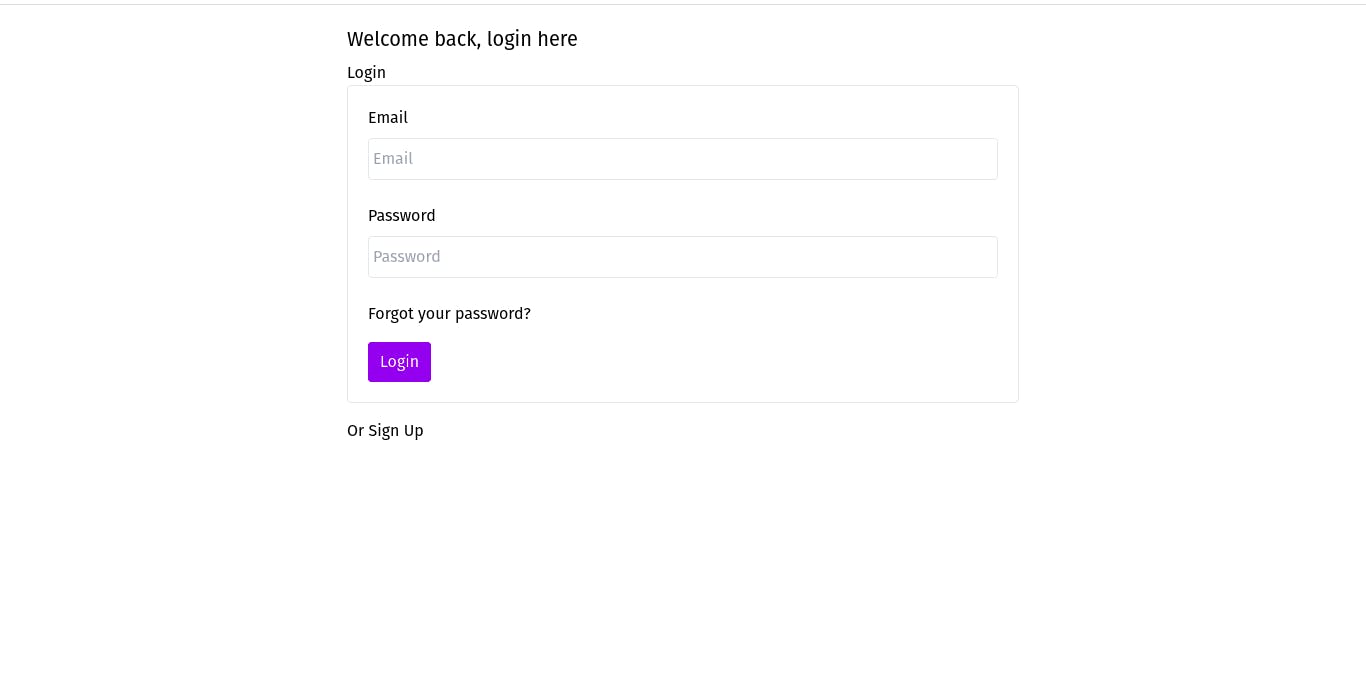
Now, remove <h1>Login</h1> from app/auth/components/LoginForm.tsx.
and also replace the following lines from LoginForm.tsx:
// from
<Link href={Routes.ForgotPasswordPage()}>
       <a>Forgot your password?</a>
 </Link>

// to
 <CustomLink href={Routes.ForgotPasswordPage()}>
     Forgot your password?
 </CustomLink>
and
// from
<Link href={Routes.SignupPage()}>Sign Up</Link>

// to
 <CustomLink href={Routes.SignupPage()}>Sign Up</CustomLink>
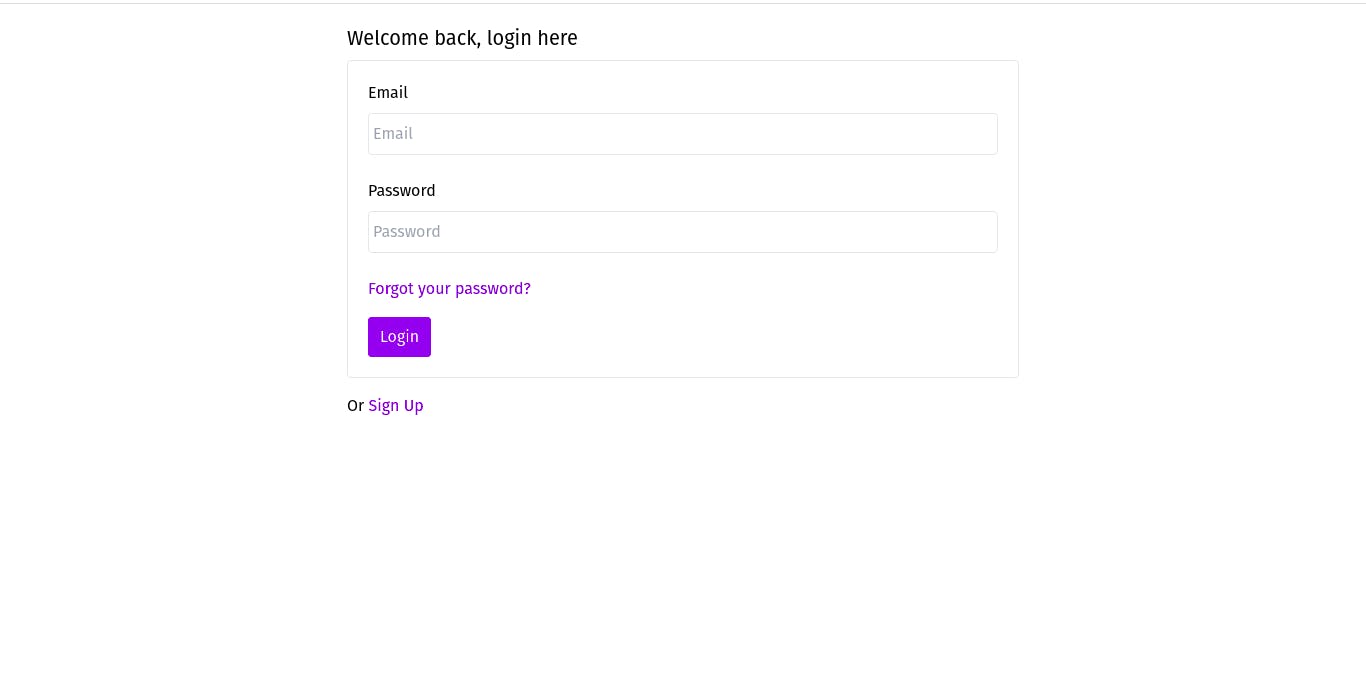
After getting up to this, your login page should look like.
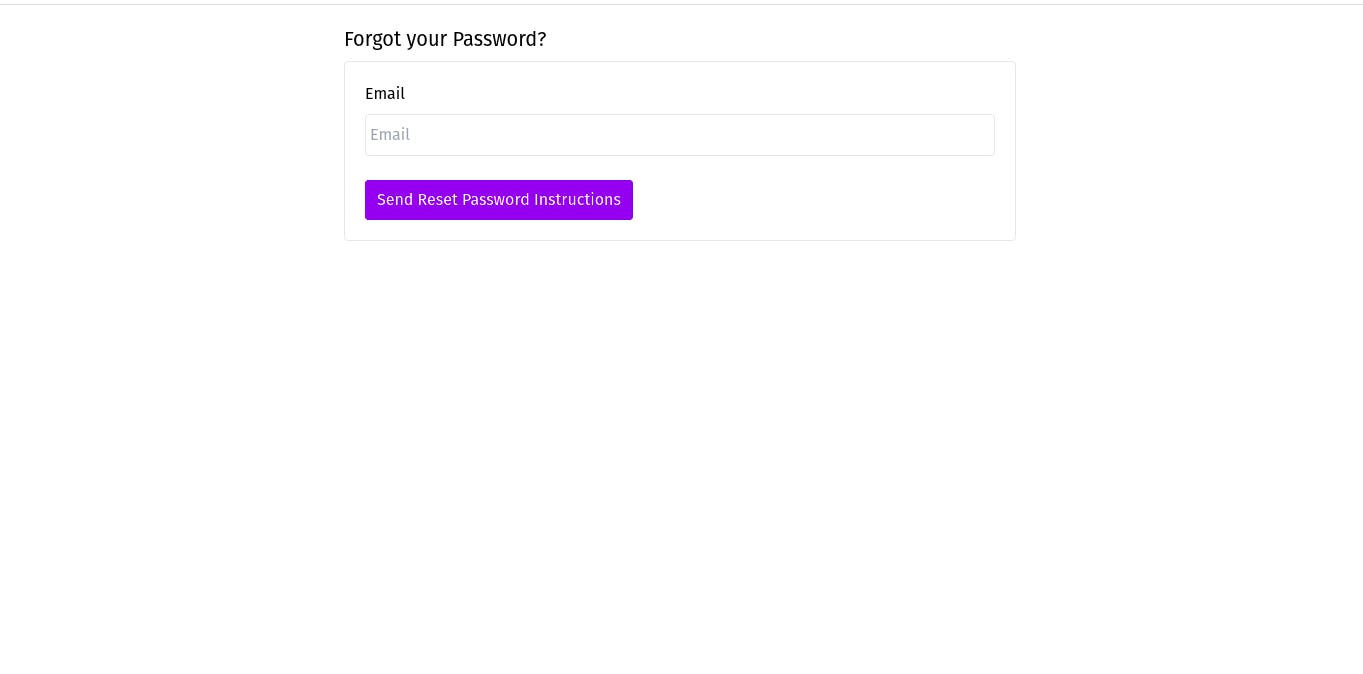
Forgot Password page
Link : '/forgot-password'
As before, change the layout to AuthLayout.
// app/auth/pages/forgot-password.tsx

import AuthLayout from "app/core/layouts/AuthLayout"
...


ForgotPasswordPage.getLayout = (page) => (
  <AuthLayout heading="Forgot your Password?" title="Forgot Your Password?">
    {page}
  </AuthLayout>
)
and remove <h1>Forgot your password?</h1> from app/auth/pages/forgot-password.tsx.
Now, the forgot password page is done and it should look like.
Now, Finally the final page of authentication.
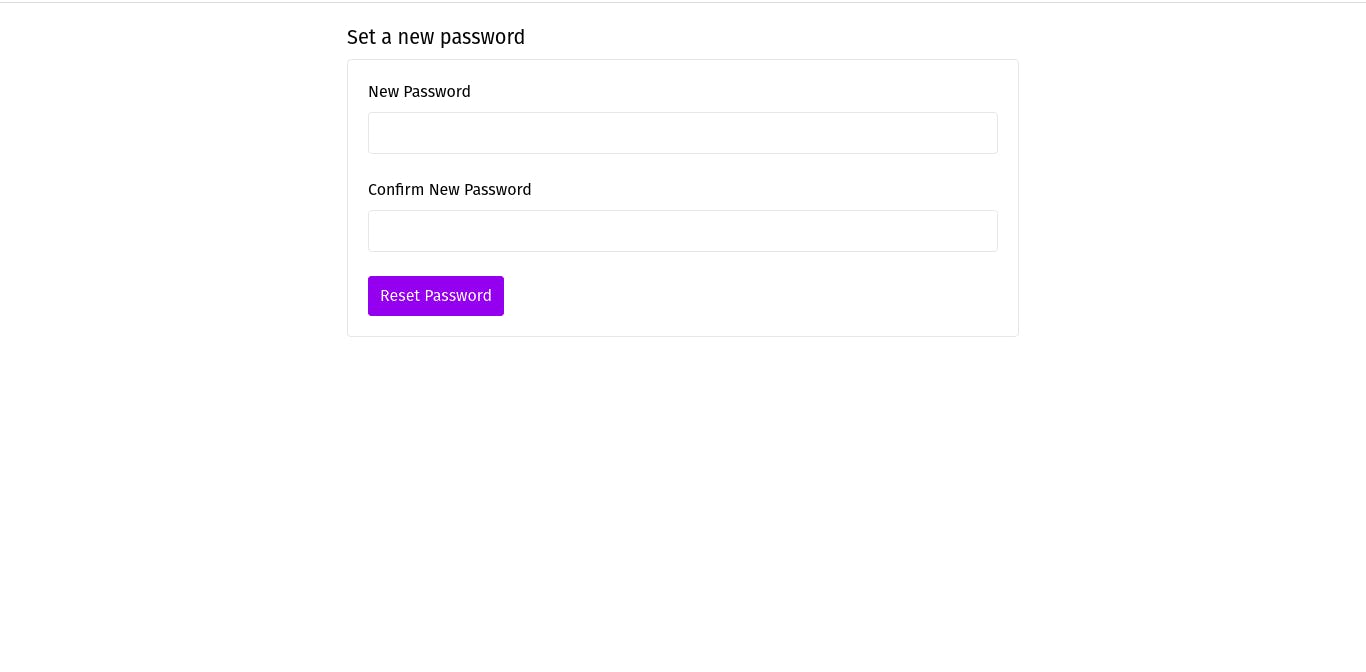
Reset Password page
Link: '/reset-password'
As before, change the layout to AuthLayout.
// app/auth/pages/reset-password.tsx

import AuthLayout from "app/core/layouts/AuthLayout"

...


ResetPasswordPage.getLayout = (page) => (
  <AuthLayout heading="Set a new password" title="Reset Your Password">
    {page}
  </AuthLayout>
)
and remove <h1>Set a New Password</h1> and it should look like this.
This much for today guys.
Recap
- Updated the schema
- Edited UI for authentication pages using Tailwindcss
- Created custom components
- Created AuthLayout and used it
