How I built Hashnode Reactor: React to hashnode articles in a snap
Hashnode reactor helps you react to your favorite hashnode articles in a fraction of a second.
Hey hashnoders
Welcome to my new article. In this article, I'll show how I have built Hashnode Reactor to make reacting to post easier.
Index
Demo
Inspiration
James Q Quick recently uploaded a video on his channel in which he created the script to clicks the button and paste that in the console using RayCast. But that wasn't the best idea to do because every time you have to open the console and paste the script or use the RayCast KeyStroke. So I have come with the chrome extension to do so.
Introduction
Hashnode Reactor is a chrome extension that will help you react to your favorite hashnode articles in a fraction of a second. It clicks all the reaction buttons in the hashnode article.
- GitHub Repo : https://github.com/projectashik/hashnode-reactor
How I built it?
- First I created a folder for the extension and opened it in the VS Code using
code .; - I created a
manifest.jsonfile with the following contents.{ "manifest_version": 2, // version of manifest we are using "name": "Hashnode Reactor", "description": "Click every reactions on the hashnode blog", "version": "1.0", // version of our extension "permissions": ["tabs", "<all_urls>"], "icons": { "16": "icons/icon16.png", "48": "icons/icon48.png", "128": "icons/icon128.png" }, "browser_action": { "default_popup": "popup.html" } }Icons are available in Github Repo
After this, I created
popup.htmland created the basic popup with button to click.<!DOCTYPE html> <html lang="en"> <head> <meta charset="UTF-8" /> <meta http-equiv="X-UA-Compatible" content="IE=edge" /> <meta name="viewport" content="width=device-width, initial-scale=1.0" /> <title>Hashnode Blog React</title> <style> button { padding: 10px 15px; background-color: blue; border-radius: 10px; color: white; width: 200px; font-size: 16px; border: none; outline: none; } p { font-size: 16px; margin-bottom: 5px; text-align: center; } </style> </head> <body> <p>Hashnode Post Reactor, click on `Click to react`</p> <button id="clickToReact">Click to react</button> <script src="popup.js"></script> </body> </html>- As you can see, I have used
popup.jsin thepopup.html. So now it's time forpopup.js. Add the following js topopup.js.
 function injectTheScript() {
   chrome.tabs.query({ active: true, currentWindow: true }, function (tabs) {
     // query the active tab, which will be only one tab
     //and inject the script in it
     chrome.tabs.executeScript(tabs[0].id, { file: 'content_script.js' });
   });
 }

 document
   .getElementById('clickToReact')
   .addEventListener('click', injectTheScript);
- In the
popup.js, we have injectedcontent_script.js.content_script.jsis the main file that clicks the reactions button in the hashnode blog.
function react() {
  const buttons = [
    'Claps claps',
    'Love it',
    'Cheers!',
    'I am loving it!',
    `It's party time`,
    `Here's my like`,
    `You're a unicorn`,
    'You deserve a trophy!',
    'Take my money',
    'Fly high',
  ];

  const toggleBtn = document.querySelector(
    '[aria-label="Toggle reaction modal"]'
  );

  if (!toggleBtn) {
    buttons.forEach((button) =>
      document.querySelector(`[aria-label="${button}"]`).click()
    );
  } else {
    toggleBtn.click();
    buttons.forEach((button) =>
      document.querySelector(`[data-reaction-name="${button}"]`).click()
    );
  }
}

react();
How you can use it?
Clone the repo from github.
git clone https://github.com/projectashik/hashnode-reactor.gitGo to chrome extensions chrome://extensions
- Enable Developer mode

- Click
Load unpacked.
- Select the folder you recently cloned
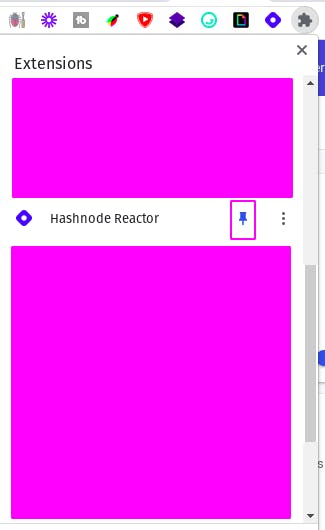
- Pin the extension

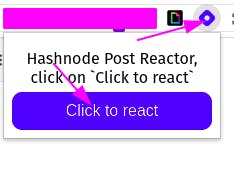
- Now react on your favourite hashnode articles in a snap by click on the extension icon and click on
Click to react.
Credits:
- Thanks to Lalit for the title and subtitle of this blog.
- Thanks to James Q Quick for the amazing video
