Blitz.js: The Fullstack React Framework
Learn by building a Project Management Application
Hey Hashnoders
Currently, Blitz.js is on rising because of its unique features. Likewise, Typescript is the superset of Javascript; Blitz.js is also like the superset of Next.js. Almost every feature of Next.js works in Blitz.js too.

Index
- Introduction
- Features
- Installation
- Routing in Blitz.js
- Building Project Management Application
- What we learned today?
Introduction
According to the Blitz.js team, Blitz is a batteries-included framework inspired by Ruby on Rails, is built on Next.js, and features a "Zero-API" 🤯 data layer abstraction that eliminates the need for REST/GraphQL.
Blitz.js is a framework built on top of Next.js, which comes with all the boring stuff already set up for you! Like ESLint, Prettier, Jest, user sign up, log in, and password reset.

Blitz.js provides helpful defaults and conventions for routing, file structure, and authentication while being extremely flexible.
Features
FullStack & monolithic: Blitz.js comes with a database to frontend all preconfigured in a single app to help you build full-stack apps in record time, which you can easily store in server or serverless like Netlify or Vercel.
API Not Required: Instead of fetching data from the backend, you import your server code directly into your components. At build time, that function import is swapped out with an auto-generated HTTP API. The generated API can also be used by apps & third parties.
Loose Opinions: In Blitz.js, you are free to plug anything that you can use. Blitz.js doesn't mandate you to use the specific library only. For example, by default, Blits.js comes with Prisma preconfigured as ORM, but you can use others if you feel comfortable on others.
Convention over Configuration: Blits.js does all the boring setup and configuration by default for you. The common project structure and architectural patterns move from one Blitz app to another and immediately feel at home.
Easy to Start, Easy to Scale: It's easy to use and easy to migrate your next.js application to a blitz.js app. Easy to scale in all forms: lines of code, number of people working in the codebase, and code execution.
Recipes: Recipes are one of the beautiful features of the blitz.js. By using recipes, you can easily set up third-party libraries with a single line of command. E.g.:
blitz install tailwindwill set up tailwind for you.Testing: Testing is preconfigured in Blitz.js. Blitz.js uses jest for testing.
First Class TypeScript Support: Blitz.js is fully built with Typescript, and the Blitz data layer is fully end-to-end typesafe. All types are completely static without needing a separate type generation process!
Installation
Blitz.js has its own powerful CLI for creating a new blitz app, code scaffolding, and many more.
To start working with Blitz.js, you must have Node.js version 12 or newer installed on your PC. If you don't have Node.js installed, go to Node.js official documentation to install it in your system.
Run the following command to install the blitz CLI globally.
yarn global add blitz # yarn

npm install -g blitz --legacy-peer-deps # npm
While installing Blitz CLI with npm
--legacy-peer-depsis needed because npm totally change the behavior of peer dependencies, and some dependencies haven't caught up
Well done, you have installed Blitz CLI on your machine. Now you can check it by running a blitz -v command.
You should get something like this. But the system option, binaries path, and blitz versions might be different.
➜ blitz -v
Linux 5.11 | linux-x64 | Node: v14.17.3

blitz: 0.39.0 (global)
blitz: 0.39.0 (local)

  Package manager: yarn
  System:
    OS: Linux 5.11 Pop!_OS 20.04 LTS
    CPU: (4) x64 Intel(R) Core(TM) i3-5005U CPU @ 2.00GHz
    Memory: 146.59 MB / 3.76 GB
    Shell: 5.8 - /usr/bin/zsh
  Binaries:
    Node: 14.17.3 - ~/.nvm/versions/node/v14.17.3/bin/node
    Yarn: 1.22.10 - ~/.nvm/versions/node/v14.17.3/bin/yarn
    npm: 6.14.13 - ~/.nvm/versions/node/v14.17.3/bin/npm
    Watchman: Not Found
  npmPackages:
    @prisma/client: Not Found
    blitz: ^0.39.0 => 0.39.0
    prisma: Not Found
    react: Not Found
    react-dom: Not Found
    typescript: Not Found
If you got any error, you can mention that in the comment section, I'll surely try to solve it.
After the blitz cli is installed, let's create a new blitz app.
You can create a new blitz app by using a blitz CLI.
blitz new your-amazing-app-name
Protip: If you don't want to install blitz CLI locally, you can even use it with the following command.
npx blitz new your-amazing-app-name
Blitz uses the alpha version of React, so you can use the features of the alpha release like
<Suspense>.
Now, you can run the following command to run the blitz application.
yarn dev # yarn

npm run dev # npm
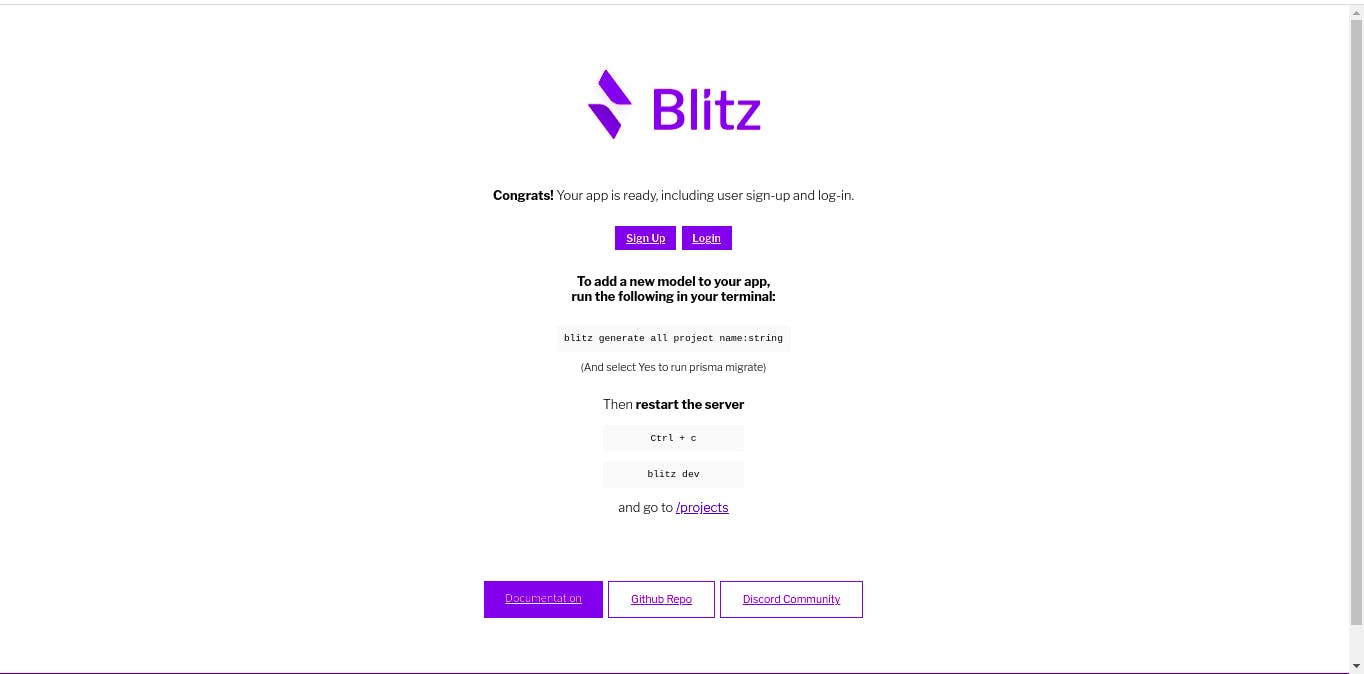
You should see something like this in your browser when you open http://localhost:3000.

You can try signing up and log in in to check the blitz.js default authentication setup.
Now let's learn it by building a simple Project Management application.
Routing in Blitz.js
Since Blitz.js is built on top of Next.js, it also uses the same file-based routing as Next.js.
See Blitz.js Routing docs for more info.
Building Project Management Application
We'll be using many cool features of blitz.js while building this application. We'll be using Tailwind CSS for styling, SQLite for the database (preconfigured with Prisma by default), and a default authentication system.
Tailwind CSS
For this tutorial, we'll be using Tailwind CSS for styling and I'm using Tailwind CSS in this project to show you how to install Tailwind CSS in blitz using the Recipe.
Run the following command in your project folder and see the magic of Blitz Recipe.
blitz install tailwind
When tailwind setup is completed you should see something like this.

And if you see your project folder, then you will find some new files postcss.config.js, tailwind.config.js, and app/core/styles/index.css.
tailwind.config.jsincludes the tailwind configurations. Blitz by default usejitmode in tailwind css.postcss.config.jsincludes the postcss configurations.app/core/styles/index.csscontains the tailwind styles.
/* index.css */

@tailwind base;
@tailwind components;
@tailwind utilities;

@layer components {
  .hero {
    @apply w-full text-[#333];
  }
}

.title {
  @apply m-0 w-full pt-20;
  font-size: 48px;
}

.title,
.description {
  @apply text-center;
}
Tailwind setup is completed with just a single command. That's a magic of Blitz recipe.
Clean Up (let's clean up blitz application)
To clean up, you have to remove the
app/pages/index.tsxfile.app/api-> Because we're not creating any API routes in this projectapp/pages/projectsfolderapp/projectsfolder
You might get a question when we're building a Project Management application then why the heck we are removing the
projectsfolder too. The reason is, I want to show you the code scaffolding feature byblitz.js.
Creating files for this project
Creating a app/pages/index.tsx file with following contents.
import { BlitzPage } from "blitz"
import Layout from "app/core/layouts/Layout"
/*
 * This file is just for a pleasant getting started page for your new app.
 * You can delete everything in here and start from scratch if you like.
 */
const Home: BlitzPage = () => {
  return <></>
}

Home.suppressFirstRenderFlicker = true
Home.getLayout = (page) => <Layout title="Home">{page}</Layout>

export default Home
Later we'll use other components to show the data on the index page.
Our project is all about project management. In this, the user will be able to create projects, get projects created by the authenticated user, update projects, delete them and also manages the tasks related to those projects. We'll cover all CRUD operations.
Now we need to create the required files for all these operations, for this Blitz provides code scaffolding from its CLI.
Run the following command to see the magic.
blitz generate all project
What it will do?
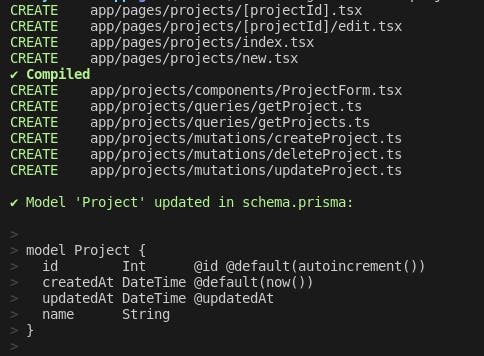
It will generate pages, queries, mutations, and Prisma models for project.
It will generate the following files.
app/pages/projects/[projectId]/edit.tsx
app/pages/projects/[projectId].tsx
app/pages/projects/index.tsx
app/pages/projects/new.tsx

app/projects/components/ProjectForm.tsx

app/projects/queries/getProject.ts
app/projects/queries/getProjects.ts
app/projects/mutations/createProject.ts
app/projects/mutations/deleteProject.ts
app/projects/mutations/updateProject.ts
And update Prisma schema.
Now, you can access the project related pages by heading to:
/projects/some-id/edit
/projects/some-id
/projects/index
/projects/new
Pages for the project related task are situated in the apps/pages/projects folder, its components lie in apps/projects/components, and its backend logics lie in app/projects/queries and app/projects/mutations.

It will ask you, whether to run prisma migrate dev or not. Currently, we'll type no. Because we have to edit our schema.prisma file.
prisma migrate devwill update your database with the schema blitz generated.
As mentioned above, we'll also need the files for managing the tasks, so let's create those files.
For that, run the following command.
blitz generate all task --parent project
What this command will do?
This command will generate some of the files:
app/pages/projects/[projectId]/tasks/[taskId].tsx
app/pages/projects/[projectId]/tasks/[taskId]/edit.tsx
app/pages/projects/[projectId]/tasks/index.tsx
app/pages/projects/[projectId]/tasks/new.tsx

app/tasks/components/TaskForm.tsx

app/tasks/queries/getTask.ts
app/tasks/queries/getTasks.ts
app/tasks/mutations/createTask.ts
app/tasks/mutations/deleteTask.ts
app/tasks/mutations/updateTask.ts
The project and tasks will have a one-to-many relationship, so every task is related to a project. So, we have created the tasks with the parent of project.
Database
Since the blitz.js comes with Prisma and SQLite preconfigured, we'll use them.
Open your db/schema.prisma file and replace the Project and Task model with the following.
model Project {
  id          Int      @id @default(autoincrement())
  createdAt   DateTime @default(now())
  updatedAt   DateTime @updatedAt
  name        String
  description String
  tasks       Task[]
}

model Task {
  id        Int      @id @default(autoincrement())
  createdAt DateTime @default(now())
  updatedAt DateTime @updatedAt
  project   Project  @relation(fields: [projectId], references: [id])
  projectId Int
}
Install Prisma Vs code extension for syntax highlighting, formating, auto-completion, jump-to-definition and linting for .prisma files.
Now run the following command to update your database.
blitz prisma migrate dev
Now, you have give a name for this migration. You can write anything. I'll type create_project_tasks_table.
Protip: You can view the GUI for managing the database by the command
blitz prisma studio.From here you can select the model.
This much for today guys, I'll come with a next article in which we'll build a complete application.
What we learned today?
- Installation of Blitz.js
- Using recipes
- Using Database
- Code Scaffolding
Thanks for reading up to here.
