


Auth0 and Next JS: Authentication complete guide
How to integrate auth0 authentication with next js


Hey, Folks 👋
I am Ashik Chapagain from Nepal. I am a full-stack web developer.
In this article, I will cover how to integrate Auth0 authentication with Next JS.
Introduction
Currently, the hashnode x Auth0 August hackathon is going on. In this hackathon, auth0 authentication implementation is a must. So for those who are having problems using Auth0 with Next JS. This article might help you.
What is Auth0?
Auth0 is an easy-to-implement, adaptable authentication and authorization platform. Auth0 helps you add authentication and authorization system in your application seamlessly.
Let's start
Let's start getting your hand dirty with some code.
First, you need to create the next js project.
yarn create next-app auth0 --typescript
OR
npx create-next-app auth0 --ts
I will be using typescript for this project.
Time for auth0 SDK installation.
yarn add @auth0/nextjs-auth0
OR
npm install @auth0/nextjs-auth0
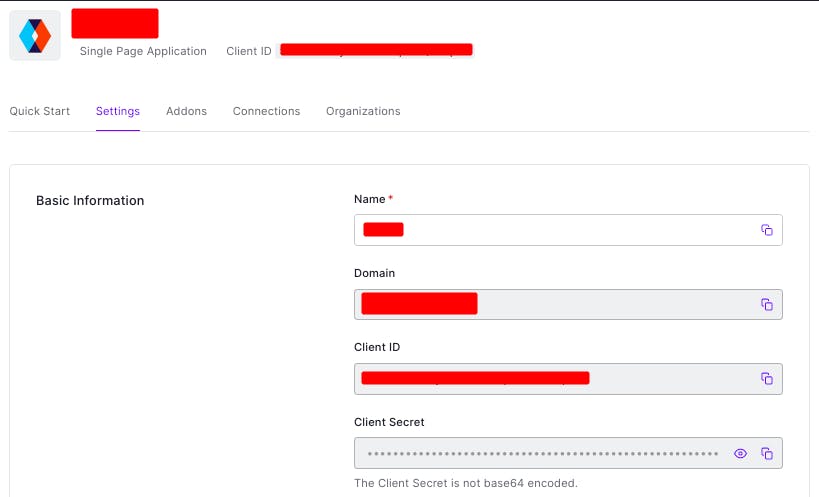
Now, create the .env.local file with the following configurations
# A long-secret value used to encrypt the session cookie
AUTH0_SECRET=LONG_RANDOM_VALUE
# The base URL of your application
AUTH0_BASE_URL=http://localhost:3000
# The URL of your Auth0 tenant domain
AUTH0_ISSUER_BASE_URL=https://YOUR_AUTH0_DOMAIN.auth0.com
# Your Auth0 application's Client ID
AUTH0_CLIENT_ID=YOUR_AUTH0_CLIENT_ID
# Your Auth0 application's Client Secret
AUTH0_CLIENT_SECRET=YOUR_AUTH0_CLIENT_SECRET
 Update the value.
💪 Protip: Use
node -e "console.log(crypto.randomBytes(32).toString('hex'))"to create LONG_RANDOM_VALUE
Then, create dynamic route handler at pages/api/auth/[...auth0].ts.
import { handleAuth } from '@auth0/nextjs-auth0';

export default handleAuth();
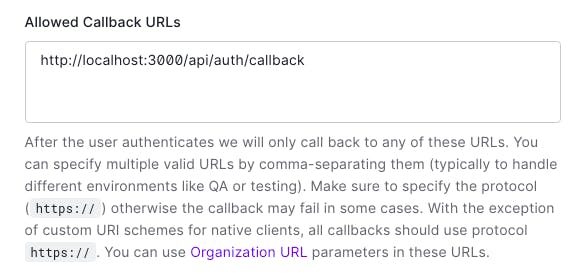
This will create the following routes: /api/auth/login, /api/auth/callback, /api/auth/logout and /api/auth/me.
🥳 This much for the server-side.
http://localhost:3000/api/auth/login 👈 For login
http://localhost:3000/api/auth/logout 👈 For logout
http://localhost:3000/api/auth/callback 👈 For auth0 callback. Add this to the allowed callback
http://localhost:3000/api/auth/me 👈 For authenticated user data

To access the user on the client-side, wrap your pages/_app.tsx component in the UserProvidercomponent.
import '../styles/globals.css';
import type { AppProps } from 'next/app';
import { UserProvider } from '@auth0/nextjs-auth0';

function MyApp({ Component, pageProps }: AppProps) {
  return (
    <UserProvider>
      <Component {...pageProps} />
    </UserProvider>
  );
}
export default MyApp;
In pages/index.tsx.
import { useUser } from '@auth0/nextjs-auth0';
import Link from 'next/link';

export default function Home() {
  const { user, error, isLoading } = useUser();

  if (isLoading) return <div>Loading...</div>;
  if (error) return <div>{error.message}</div>;

  if (user) {
    return (
      <div>
        Welcome {user.name}! <Link href='/api/auth/logout'>Logout</Link>
      </div>
    );
  }

  return <Link href='/api/auth/login'>Login</Link>;
}
Now, how to create auth protected page.
To create authentication required page just wrap the page component function with the withPageAuthRequired function.
E.g:
// pages/protected.tsx

import { UserProfile, withPageAuthRequired } from '@auth0/nextjs-auth0';

function ProtectedPage({ user }: { user: UserProfile }) {
  return <h1>Protected page {user.email}</h1>;
}
export default withPageAuthRequired(ProtectedPage);
Now, let's create authentication-required API routes.
// pages/api/protected.ts
import {
  getSession,
  Session,
  UserProfile,
  WithApiAuthRequired,
  withApiAuthRequired,
} from '@auth0/nextjs-auth0';
import { NextApiRequest, NextApiResponse } from 'next';

async function protectedRoute(req: NextApiRequest, res: NextApiResponse) {
  const { user }: { user: UserProfile } = await getSession(req, res);
  res.json(user);
}

export default withApiAuthRequired(protectedRoute);
That's it. How simple it is to implement Auth0. Hope you like the article.